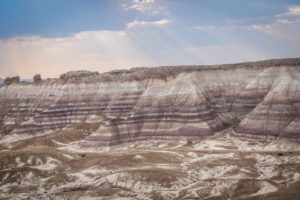
More than a mile deep, the Grand Canyon calls to adventure lovers and hiking enthusiasts. This natural wonder of the world just asks to be traversed. And if you’re answering that call, a hike as strenuous as this demands proper preparation. We hiked it and definitely left a few things behind. We also packed stuff that we didn’t need. So we’ve created this Grand Canyon backpacking packing list for those of you planning on staying overnight in the Grand Canyon. This list includes some general backpacking gear as well as some items that are very specific of a Grand Canyon hike. We will also be really honest and tell you when you don’t need something to help you save on weight.
Grand Canyon Backpacking Packing ListToggle Table of ContentToggle
Grand Canyon Backpacking Packing List
Hiking Backpack
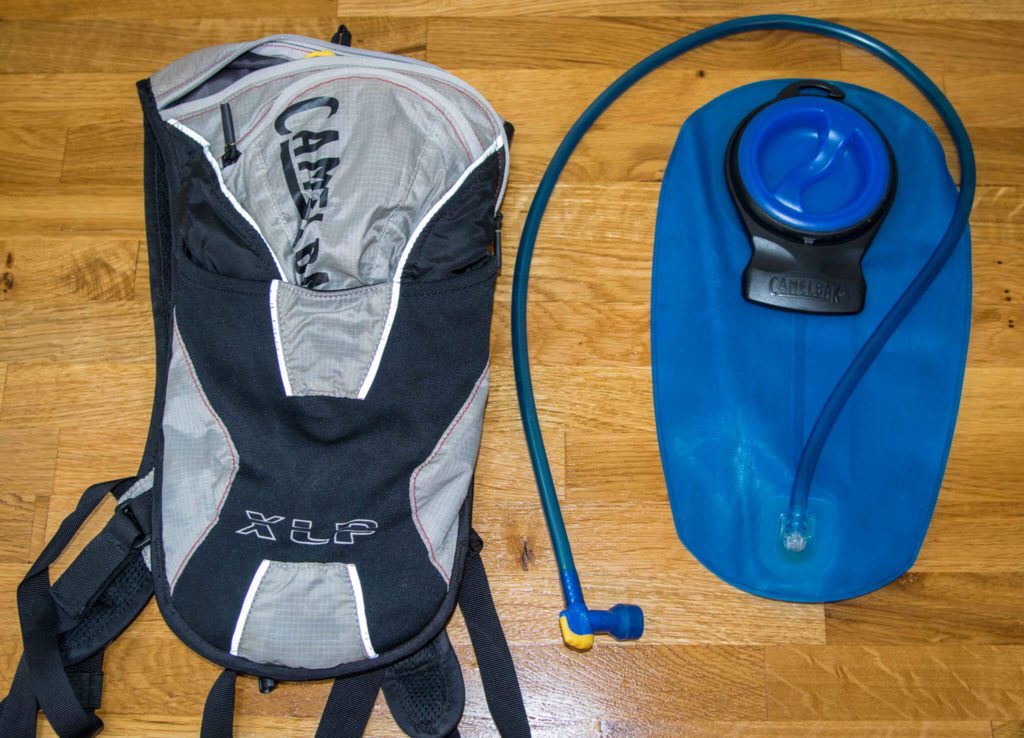
If you’re planning on spending a night or more in the Grand Canyon, you’ll definitely want a hiking backpack. Even if you’re going for a day trip, we’d recommend it. And the reason for that is twofold. Hiking backpacks have water bladders incorporated into their design. Water bladders are great for a Grand Canyon hike as they are much more easy to use that multiple water bottles. They also have waist straps. Waist straps are really helpful when hiking as they help to distribute the weight of your pack more evenly across your body. If you’re purchasing a backpack specifically for this hike, look for those two features.
We completed our two day hike with one overnight style backpack and one day pack style backpack with all of our gear.
Sleeping Gear
Sleeping Bag
Bring a lightweight sleeping bag that is rated for the temperature you’ll be sleeping in. You shouldn’t need to break the budget on a negative temperature sleeping bag as you’ll likely be hiking in mild temperatures. However, you will want to spend the extra money to get a high quality backpacking sleeping bag. This extra money will get you a much lighter sleeping bag which is definitely worth it on this hike.
Sleeping pad
Toss that lightweight sleeping pad in. It’s lightweight and let’s face it, we’re all too old to sleep on the ground.
Lightweight Tent
This does not mean that cheap four person tent you have for “camping”. It means a lightweight (aka expensive) backpacking tent. A backpacking tent is a splurge item that is well worth the extra money. For reference, our two person backpacking tent that we squeeze into costs more than our six person standing height tent. And it was totally worth it on this trip. You should also have a rain cover with you, just in case.
Clothing
Sun Protection
Here’s one of those weight vs worth issues. All Grand Canyon backpacking packing lists out there will tell you to pack sunscreen. And you may want to. However, we did this hike in the fall, we had a nice “base tan” and we weren’t really worried about getting burnt. We spend pretty much all summer on the water so we felt confident we wouldn’t burn. That being said, we did get red so a fairer skinned person would really need some sunscreen. You can buy nice little packets of sunscreen meant for travel that would help you to pack sunscreen and save on weight.
One thing I wish we would have packed was lip balm with sunscreen. Our lips were so chapped when we were done and the weight of lip balm is totally worth it.
You’ll also want to pack a hat with a brim to keep the sun off of your face. Also, you’ll want a bandana to wear to keep your hair out of your face if you’re rocking long hair. We also packed sunglass and wore them for almost the entire hike. Most people didn’t. I found that strange but for the weight that they are and the amount of time we used them, I’d recommend packing them.
Hiking or Trail Running shoes
Shoes are recommended over boots for this hike. The trails are in really good shape so that super sturdy hiking boot isn’t necessary. Instead wear some nice breathable hiking shoes that are light to keep your feet fresh and avoid extra weight. Also, avoid high top shoes. Normally, we wouldn’t recommend hiking shoes below the ankles but the incline on the trails is such that wearing hiking boots above the ankle felt like shoes were rubbing too much on my legs or I had to loosen them and then they slipped around.
Layered Hiking Clothes
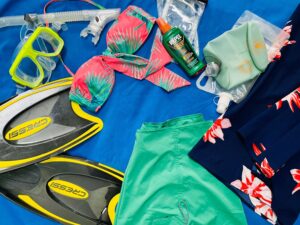
Pack for the weather you’ll be hiking in but remember you’ll be hiking in a least a 20 °F range of temperatures with the elevation change. We completed the hike in October. We wore hiking pants that zipped into shorts, moisture wicking T-shirts, and we had a rain jacket for the cold weather and potential rain. No matter the time of year, wear wool socks (don’t wear cotton). We also packed a spare pair of socks and underwear for additional days – because we like keeping our important bits fresh. However, don’t worry about packing any other fresh clothes as there aren’t showers so attempting to stay clean is pretty fruitless.
Recommended Extras
Knife
I honestly don’t know why we pack this when backpacking, but Scott thinks it’s essential to fight off potential attacking wildlife. And we did use it for food.
First Aid
First Aid on your Grand Canyon hike should include everything you may need for handling hiking mishaps. This includes something for popping blisters and something for covering them (safety pin and bandaids for us). This also includes salt tablets if you feel like you are not retaining enough water. Throw in a few pain relief pills as well for those achy joints at the end of the day.
Also, make sure your first aid kit includes things you may need in the course of a normal day, including any daily pills. For people who suffer from reoccurring illnesses, make sure to pack that treatment as well. I’m a migraine suffer who didn’t pack her magic migraine pills 🙁
Lastly, make sure to prepare yourself for some bigger injuries. Medical care is sparse in the Grand Canyon. We packed dressing for larger wounds and wraps for broken bones and sprains. We didn’t have to use them but we had them just in case.
Trekking Poles
Seriously, you’ll want these. We never use them but read that they are a must-have for this hike and they should be on every Grand Canyon backpacking packing list. I brought a pair, Scott didn’t. About two hours in to the hike, we each had one pole and I was doing my “told you so” face. Honestly, one pole per person did work but two is better for the hike down into the canyon. The poles add stability and balance on the way down. This was important as tripping and falling on this hike is something you don’t want to do, especially on some steep parts of the trail. On the way up, it mentally helped me to think I was taking weight off of my feet. And most importantly, it keeps your hands up so you avoid swollen fingers from the long hike.
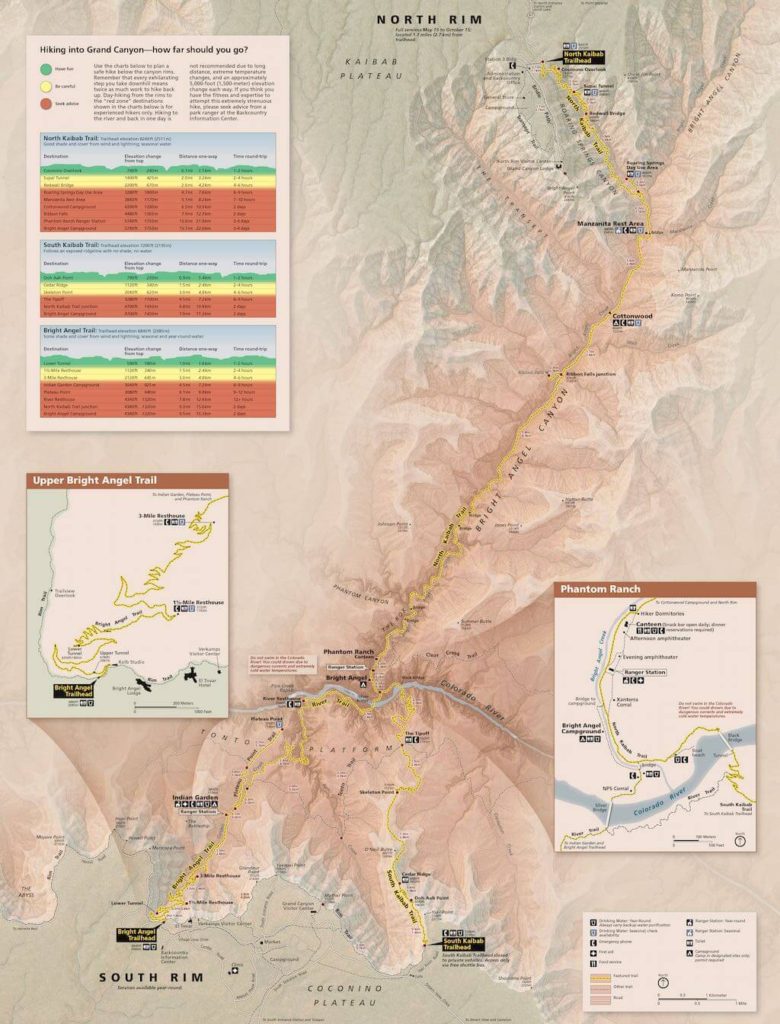
A Detailed Map
Surprisingly, you’ll have decent service at the edge of the Grand Canyon. However, you’ll completely loose all contact with the outside world one hour or less into your hike. Trails are really well marked here. However, we recommend having a good hiking map of the Canyon, especially if you’re planning on hiking less popular trails. Even if you do the really standard hikes, you’ll want to have the map so you can keep track of your progress. We found ourselves asking “are we there yet?” more times than we’d like to admit. And our map helped us keep track of our progress and keep realistic expectations of the hike.
You can also bring one of those fancy GPS maps, but we didn’t so it’s not necessary.
Toiletries
Bring some individually packaged wet wipes. These are great to clean up with before you start touching food and before you go to bed at night. The individual packages mean you don’t have to carry all the extra ones you won’t need. We packed one for each meal and one for bedtime.
Other Grand Canyon backpacking packing lists will suggest a toothbrush and toothpaste and deodorant. We’re married and are really beyond the smell-good stage of our relationship so we left that behind. Though it was one of the first things we did when we got back to the top. For one night, we really didn’t think this was worth the weight and we don’t regret leaving it behind.
Toilet “Utensils”
Now, on to nature’s call. When planning your Grand Canyon backpacking packing list, you’ll want to first consider where you plan on using the bathroom. If you plan your toilet use well, you should be able to avoid packing any toilet “utensils”. The toilets were spaced perfectly so that we used them and didn’t use nature. However, if you do need to go in the wild, you’ll need to pack your own toilet paper, a bag to hike it out (yes the used stuff), and a trowel for digging a hole and burying your waste. We packed all of this and didn’t need it. However, if you have unreliable bowels, I’d suggest packing this equipment.
For the ladies, try to avoid being on your period when you do this hike. If your Aunt Flow is visiting, you’ll have to pack the proper supplies along with a bag to carry all your own waste out. A majority of toilets didn’t have trashes and they all had signs encouraging everyone to carry out their own menstrual waste.
Sustenance
Food
Food is one of the most important things for your Grand Canyon backpacking packing list so make sure to plan ahead. You want to try to pack enough food so that you won’t be hungry but not so much that you’re carrying extra weight. Once you get hiking, if you feel like you have too much, offer them to people resting – they may not have brought enough. Also, the ranger stations will take unopened donations of super salty snacks to pass out to unprepared hikers.
The top things to look for in food are weight, sodium and calories. First you want the food to be as lightweight as possible to reduce the amount you have to carry. Next, you want high sodium levels to help you to retain the water you’ll be drinking. Failure to have enough sodium can lead to a dangerous condition called hyponatremia. The park seems to warn of this more than it does dehydration so pack salty snacks to avoid it, as it seems pretty common. And lastly, you want to pack lots of calories. This is because you’ll be doing a huge amount of work climbing out of that giant hole. You’ll also need those calories to keep all your organs functioning so that you don’t get dehydrated.
Typically, we pack dehydrated meals for backpacking. However, this require hot water to rehydrate in a timely manner. Since fires aren’t allowed in the Grand Canyon, you’ll have to bring a camping stove. This just isn’t worth the weight for a short trip in our opinion, so we skipped it. However, if you want to have a “real meal” in the canyon, you can get free hot water at the canteen at Phantom Ranch. Here you could have a dehydrated meal without packing a camping stove.
For food, we packed lots of small high-calorie, salty snacks. We liked this approach.
Here are some food suggestions that we like when hiking:
- granola clusters
- dried fruit
- GORP
- Jerky
- Summer Sausage
- Poptarts
- Little Debbies treats (mainly this hiking is an excuse to eat them)
- PB&J bagel sandwiches (bagels hold their shape better than bread)
- Flavored Tuna/Chicken packs
- Chips/Pretzels
- Salt Packets (to put on everything you can)
- Electrolyte tabs to add to water
3 Liters of Water Storage per Person
We took 4 liters of water bladders and two 1-little water bottles for two people. Fortunately, we never saw the bottom of the bladders, which was good! We used the water bottles to mix up electrolyte drink, without contaminating the bladders. If you don’t care about taste, you could probably go without the water bottles.
Need to buy a water bladder, check out our buying guide to choose a hydration pack?
We filled up completely before leaving for the hike and filled up again at the bottom. Then we filled halfway at Indian Garden. Those were all the refill stations we needed for our two day Rim to River to Rim hike.
Water filter
You’ll only need to pack this if any of the water stations that you plan on using are closed or not working. You’ll need to take a water filter with you to fill up your water from potentially unclean sources. Know where you’ll need to fill up with water so you can plan ahead. If all of your water filling stations are open, and you have plenty of water storage, you can leave this behind. You’ll most likely need this in the colder months when water sources are shut down or broken due to freezing temperatures.
Hike Specific Extras
Headlamp
If you plan on hiking late into the night or having to set up late, bring a headlamp. We brought it thinking we would hike to a viewpoint for sunset and need it to get back to camp. If you have your hikes planned to only occur during daytime, leave this behind and use your phone flashlight in an emergency.
Leave the Camera, Take the Phone
Just take your phone. It takes great pictures. I HAD to pack our DSLR camera. My compromise was only taking one lens. However, we really didn’t use it much. It was just a lot of work to take it out of the pack. And it is a ton of weight. I wish I would have left it behind and just taken the phone. Also, you only need one phone if you’re hiking in a group. You can save the weight and share pictures later.
Crampons
If it is winter, the park recommends crampons for the icy trails. However, we just recommend hiking at a different non-icy time of year.
And that should do it! Remember when packing, what is the weight to worth ratio? If it has more weight than worth, leave it behind. We hope this Grand Canyon backpacking packing list has helped you to prepare your packs! Please leave suggestions or questions in the comments section.

For the “Aunt Flo” reference… Planning a backpacking trip in the Grand Canyon is generally done months in advance while”planning” your period is impossible in many situations (yes, sometimes medication can allow you to make some alterations to your cycle, but not always and not ever with some people). I would recommend using a menstrual cup while backpacking in any location. Especially if you don’t have a terribly heavy period. If you get a large capacity one, they can sometimes last an entire day without emptying. Empty into toilets when available and make sure to have clean hands and you are good – AND don’t have to pack anything out!
Thanks Tara. That’s a great suggestion for backpacking.