Devils Bridge is one of the most popular hikes in Sedona, Arizona. It’s a relatively easy hike to do with some great views of a natural bridge at the end of the trail. It is consistently voted the best hike in Sedona. As such, this makes this trail a busy one as you wind your way through the beautiful red rocks. To complicate matters, parking in Sedona is famously lacking. So we’ve put together this Devils Bridge hiking guide to help you plan your Sedona hike.
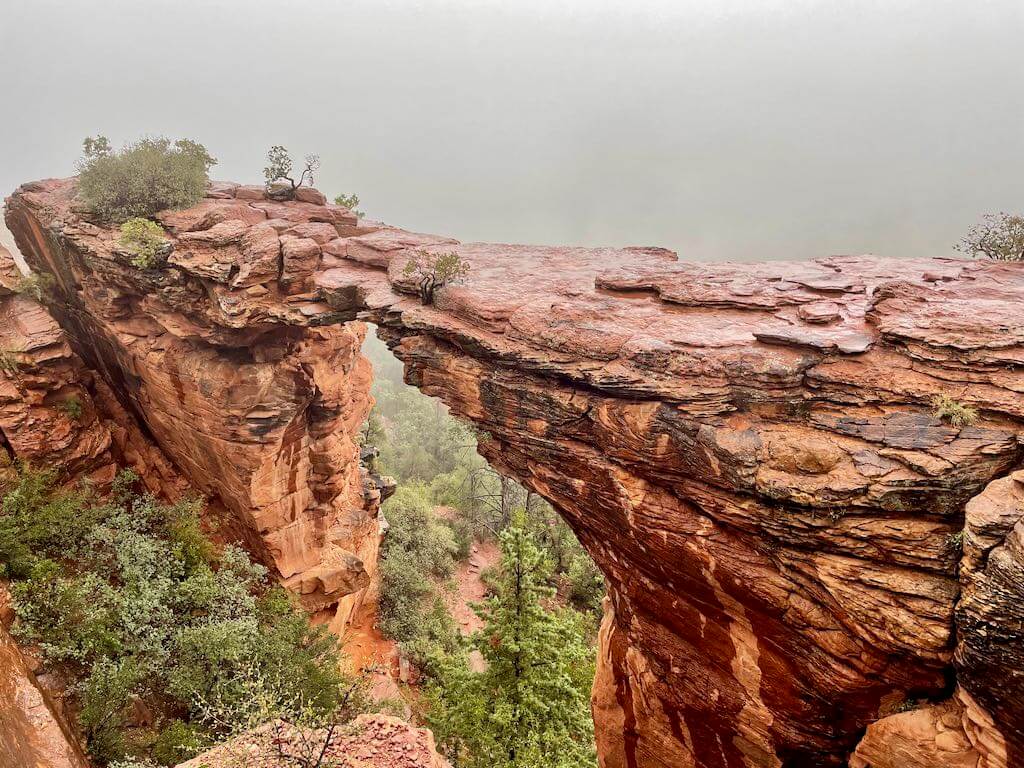
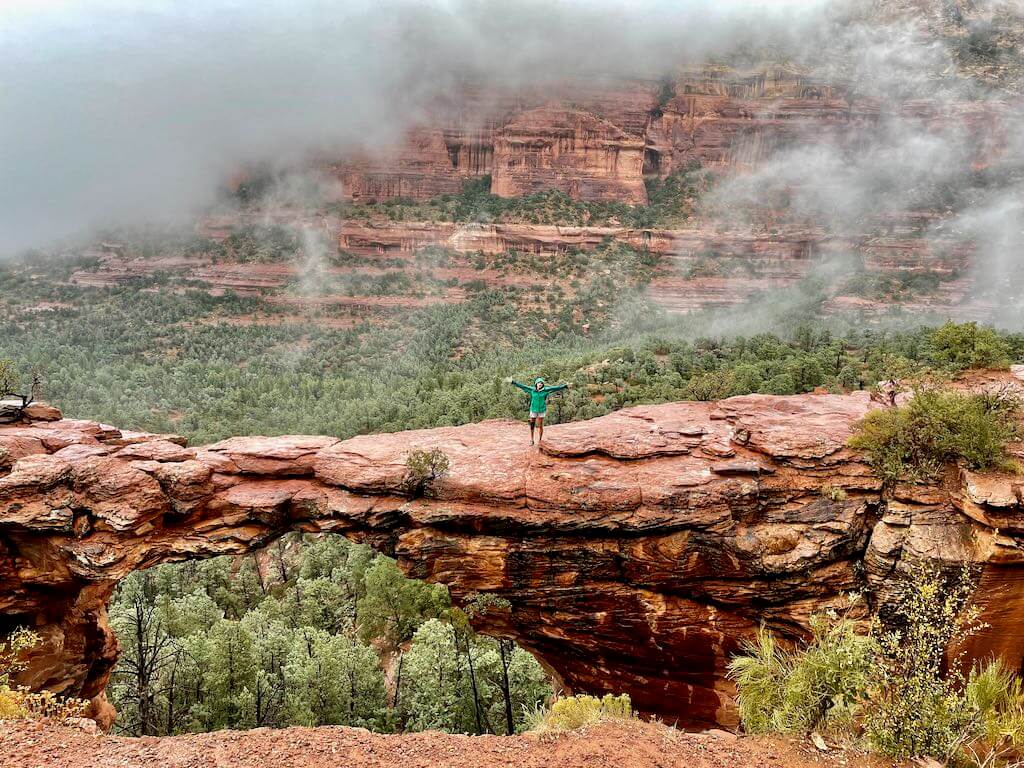
Located in the Coconino National Forest on the Northern side of Sedona, this hike takes you through some of the beautiful towering red rocks that Sedona is famous for. After completing the hike, you’ll find yourself at one of the best views in Sedona. The natural bridge is the largest natural sandstone arch in the Sedona area. What’s even better? Those brave of heart can walk across the arch and get photos from the top of it. However, please exercise some caution, it’s a steep fall.
Devils Bridge TrailToggle Table of ContentToggle
Devils Bridge Stats
- Distance: 1.8 miles out-and-back
- Time: 1.5 hours
- Elevation change: 400 feet
- Difficulty: Easy, with moderate scrambling for a short period
- Fee: $5, or an America the Beautiful Parks Pass
Getting There
If you have a 4WD high clearance vehicle and can find a parking spot at the Devils Bridge trailhead, you’ll only have to walk 1.8 miles and your hike will only take 1-2 hours. Good for you! However, a majority of people cannot get a parking spot in this lot. It fills up early in the morning and really does require a high clearance vehicle. Should I say that again? They leave giant rocks at the beginning of the road as a warning to what you will find along the road.
So if you do not have a vehicle built for traveling a sandy road in the desert, you’ll need to park elsewhere. There are two options. First, you can park at the Dry Creek trailhead. From here, you’ll walk along the same pathway that those 4WD vehicles will drive down. This will increase your hike to 2-3 hours and 5.8 miles. However, you’ll be walking along a really boring poorly constructed road. Also, the Dry Creek trailhead fills up quickly and you may even be walking farther as people begin to park along the road once the lot fills up. When we visited, people were parked an extra half mile from the lot. So for these reasons, we don’t recommend this either.
What we do recommend is parking at the Mescal trailhead and hiking from here. When we got to the Mescal trailhead, there were only 6 cars here and plenty of spots to park. The hike from here is along an actual hiking trail so it makes for nice scenery. From here, you’ll increase your hiking time to 2-3 hours and 4.6 miles. You’ll start on the Mescal Trail and then merge onto the Chuckwagon Trail until you get to the Devils Bridge trailhead.
Devils Bridge Hike
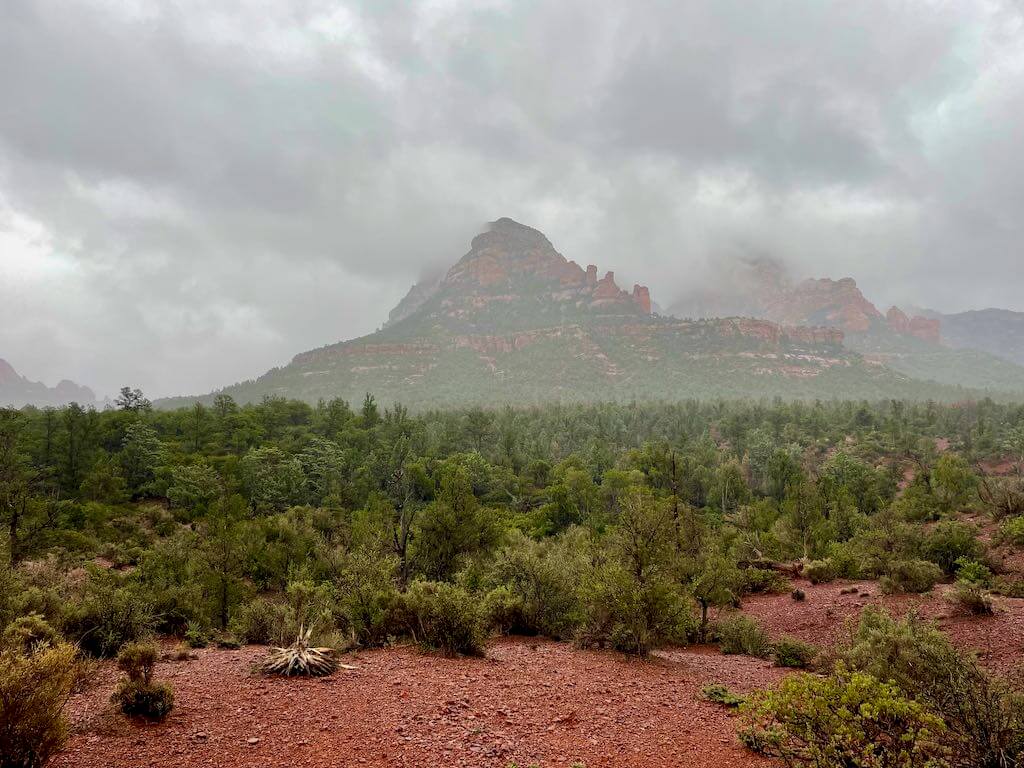
However you choose to get to the Devils Bridge trailhead, whether by Jeep or easy hiking, the Devils Bridge hike is really a fun one. From the Devils Bridge trailhead, you’ll start a gentle uphill climb. Along this climb, you’ll get great views of the red rocks nearby. However, you will not see the Devils Bridge. Don’t worry, you’re on the right trail, you won’t see the Devils Bridge until you are standing right in front of it.
Once the uphill portion of the climb ends, you’ll begin the more moderate part of the hike where you’ll find stone staircases to climb up. As you near the end of the hike, these well laid staircases will turn into narrow rock scrambles. At this point, the trail can really only accommodate one person at a time. However, don’t let that worry you. Even on this busy trail, this section is so short that waiting your turn won’t affect your hiking time overall.

After the scramble, you’ll be near Devils Bridge. You’ll round a bend and see the beautiful sandstone arch. Once here, there will likely see other hikers waiting to take pictures. Everyone was really good about taking turns on the arch. Just be respectful of each other and keep your photo sessions short and sweet. If you do choose to walk out onto the bridge, it really is wider than it appears in photos. Just use your common sense and stay in the center of the bridge. I am super terrified of heights but I went out there thanks to a healthy dose of peer pressure and when I was on the arch, it wasn’t nearly as scary as I thought it would be.
Things to Know About the Devils Bridge Hike
Expect to wait to have your photo taken on the arch. We were here in the rain and there was still a crowd. We waited about 15 minutes for our “turn” on the arch in the wind and rain.
This is a pretty easy hike for anyone who is fully mobile. Even kids. This is a super family friendly hike because of how short and easy it is. However, you’ll want to keep an eye out for the kiddos at Devils Bridge as the potential fall here is far.
This hike is REALLY popular. Try to get here early in the morning (before 10AM) to ensure that you have a parking spot and can complete this hike before it gets too hot. You may still have trouble finding parking unless you arrive before 7AM.
You will be scrambling up rocks. Do not bring your dog. We saw lots of dogs on this trail and not one of them was able to make it up and down the rock scrambles. You will end up carrying your dog. And your dog will be really nervous.
When you’re waiting for your photo on the natural bridge, make friends with a fellow hiker. They’ll probably be willing to take your photo on the bridge in exchange for you taking theirs.
Bring a map or take a photo of the map at the trailhead. And don’t listen to your husband when he assures you this way is the correct way to go even though nothing looks familiar. Trails here are really poorly marked. And 4 extra miles of hiking in the rain is not fun.
We hope this has helped you to plan your own hike to Devils Bridge. Let us know about your own experiences making this trek to help us add to our post.